Marketo
Send contact and event data to Regal with Marketo.
This guide describes how to use Marketo to send data to Regal. It discusses how to set up Marketo to create contacts and send track events to Regal.
Marketo Admin Account Required
The following steps require admin privileges in your Marketo instance.
Sending Data from Marketo to Regal
While Marketo does not have a way to pass through all user and event data automatically to a 3rd party, you can set up Smart Campaigns that are triggered when new contacts are created, important profile fields are updated or important events occur, and send that data to Regal through webhooks.
Creating New Contacts & Sending Events
Create a Smart Campaign that webhooks out to Regal every time a new contact is created in Marketo to be available for calls and texts in Regal.
Below is a recommended smart campaign for how to accomplish this, though the logic for the trigger of your workflow may differ depending on what constitutes a relevant contact for your company to send to Regal.
Step 1: Create a new Webhook titled "Send New Contact to Regal"
Step 2: Configure your Webhook
-
URL: https//events.regalvoice.com/events
-
Request Type: POST
-
Template (i.e. body): Input custom json following the format from: https://developer.regalvoice.com/#tag/Regal-Voice-API/paths/~1events/post. Note, You are able to customize the data you send Regal by customizing the Template by add additional Marketo tokens
- Example:
{ "traits": { "phones": { {{lead.Phone Number}}: { "voiceOptIn": { "subscribed": true, "source": {{lead.Source}} }, "smsOptIn": { "subscribed": true, "source": {{lead.Source}} } } }, "emails": { {{lead.Email Address}}: { "subscribed": true, "source": {{lead.Source}} } }, "firstName": {{lead.First name}}, "lastName": {{lead.First name}}, "customProperty1": {{lead.Property1}}, "customProperty2": {{lead.Property2}} }, "name": "Marketo Form Submitted", "properties": { "leadSource": {{lead.Source}} } } -
Response Format: None
-
Basic Auth: Leave blank
-
Add a Customer Header:
- Authorization : Enter your Regal API key
-
Click "Create"
Email [email protected] to get your API key
Step 3: Create a new Smart Campaign titled "Create New Contact for Regal"
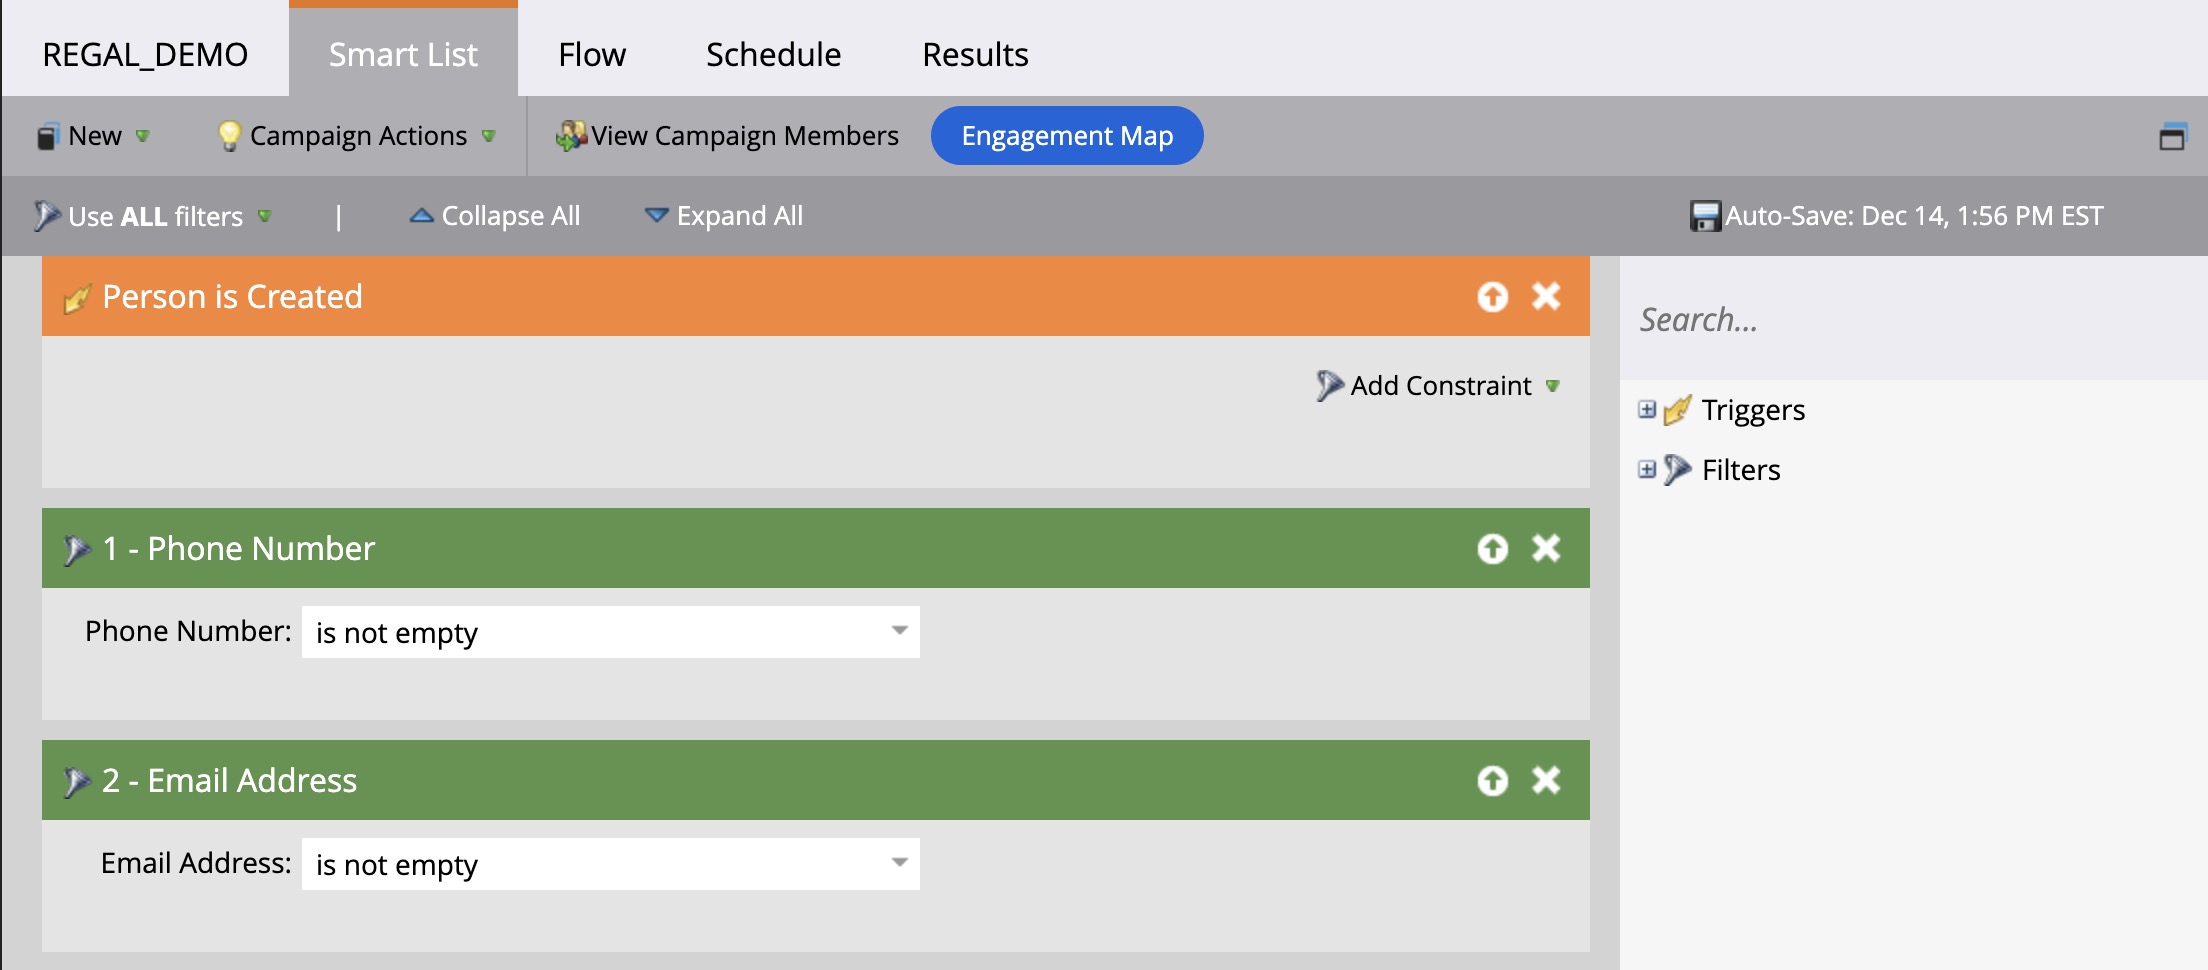
Step 4: Configure the Smart List when a "Person is Created" in Marketo and add a filter to make sure their phone and or email are not empty. Note, this logic can be customized to fit your use case and Marketo set up.
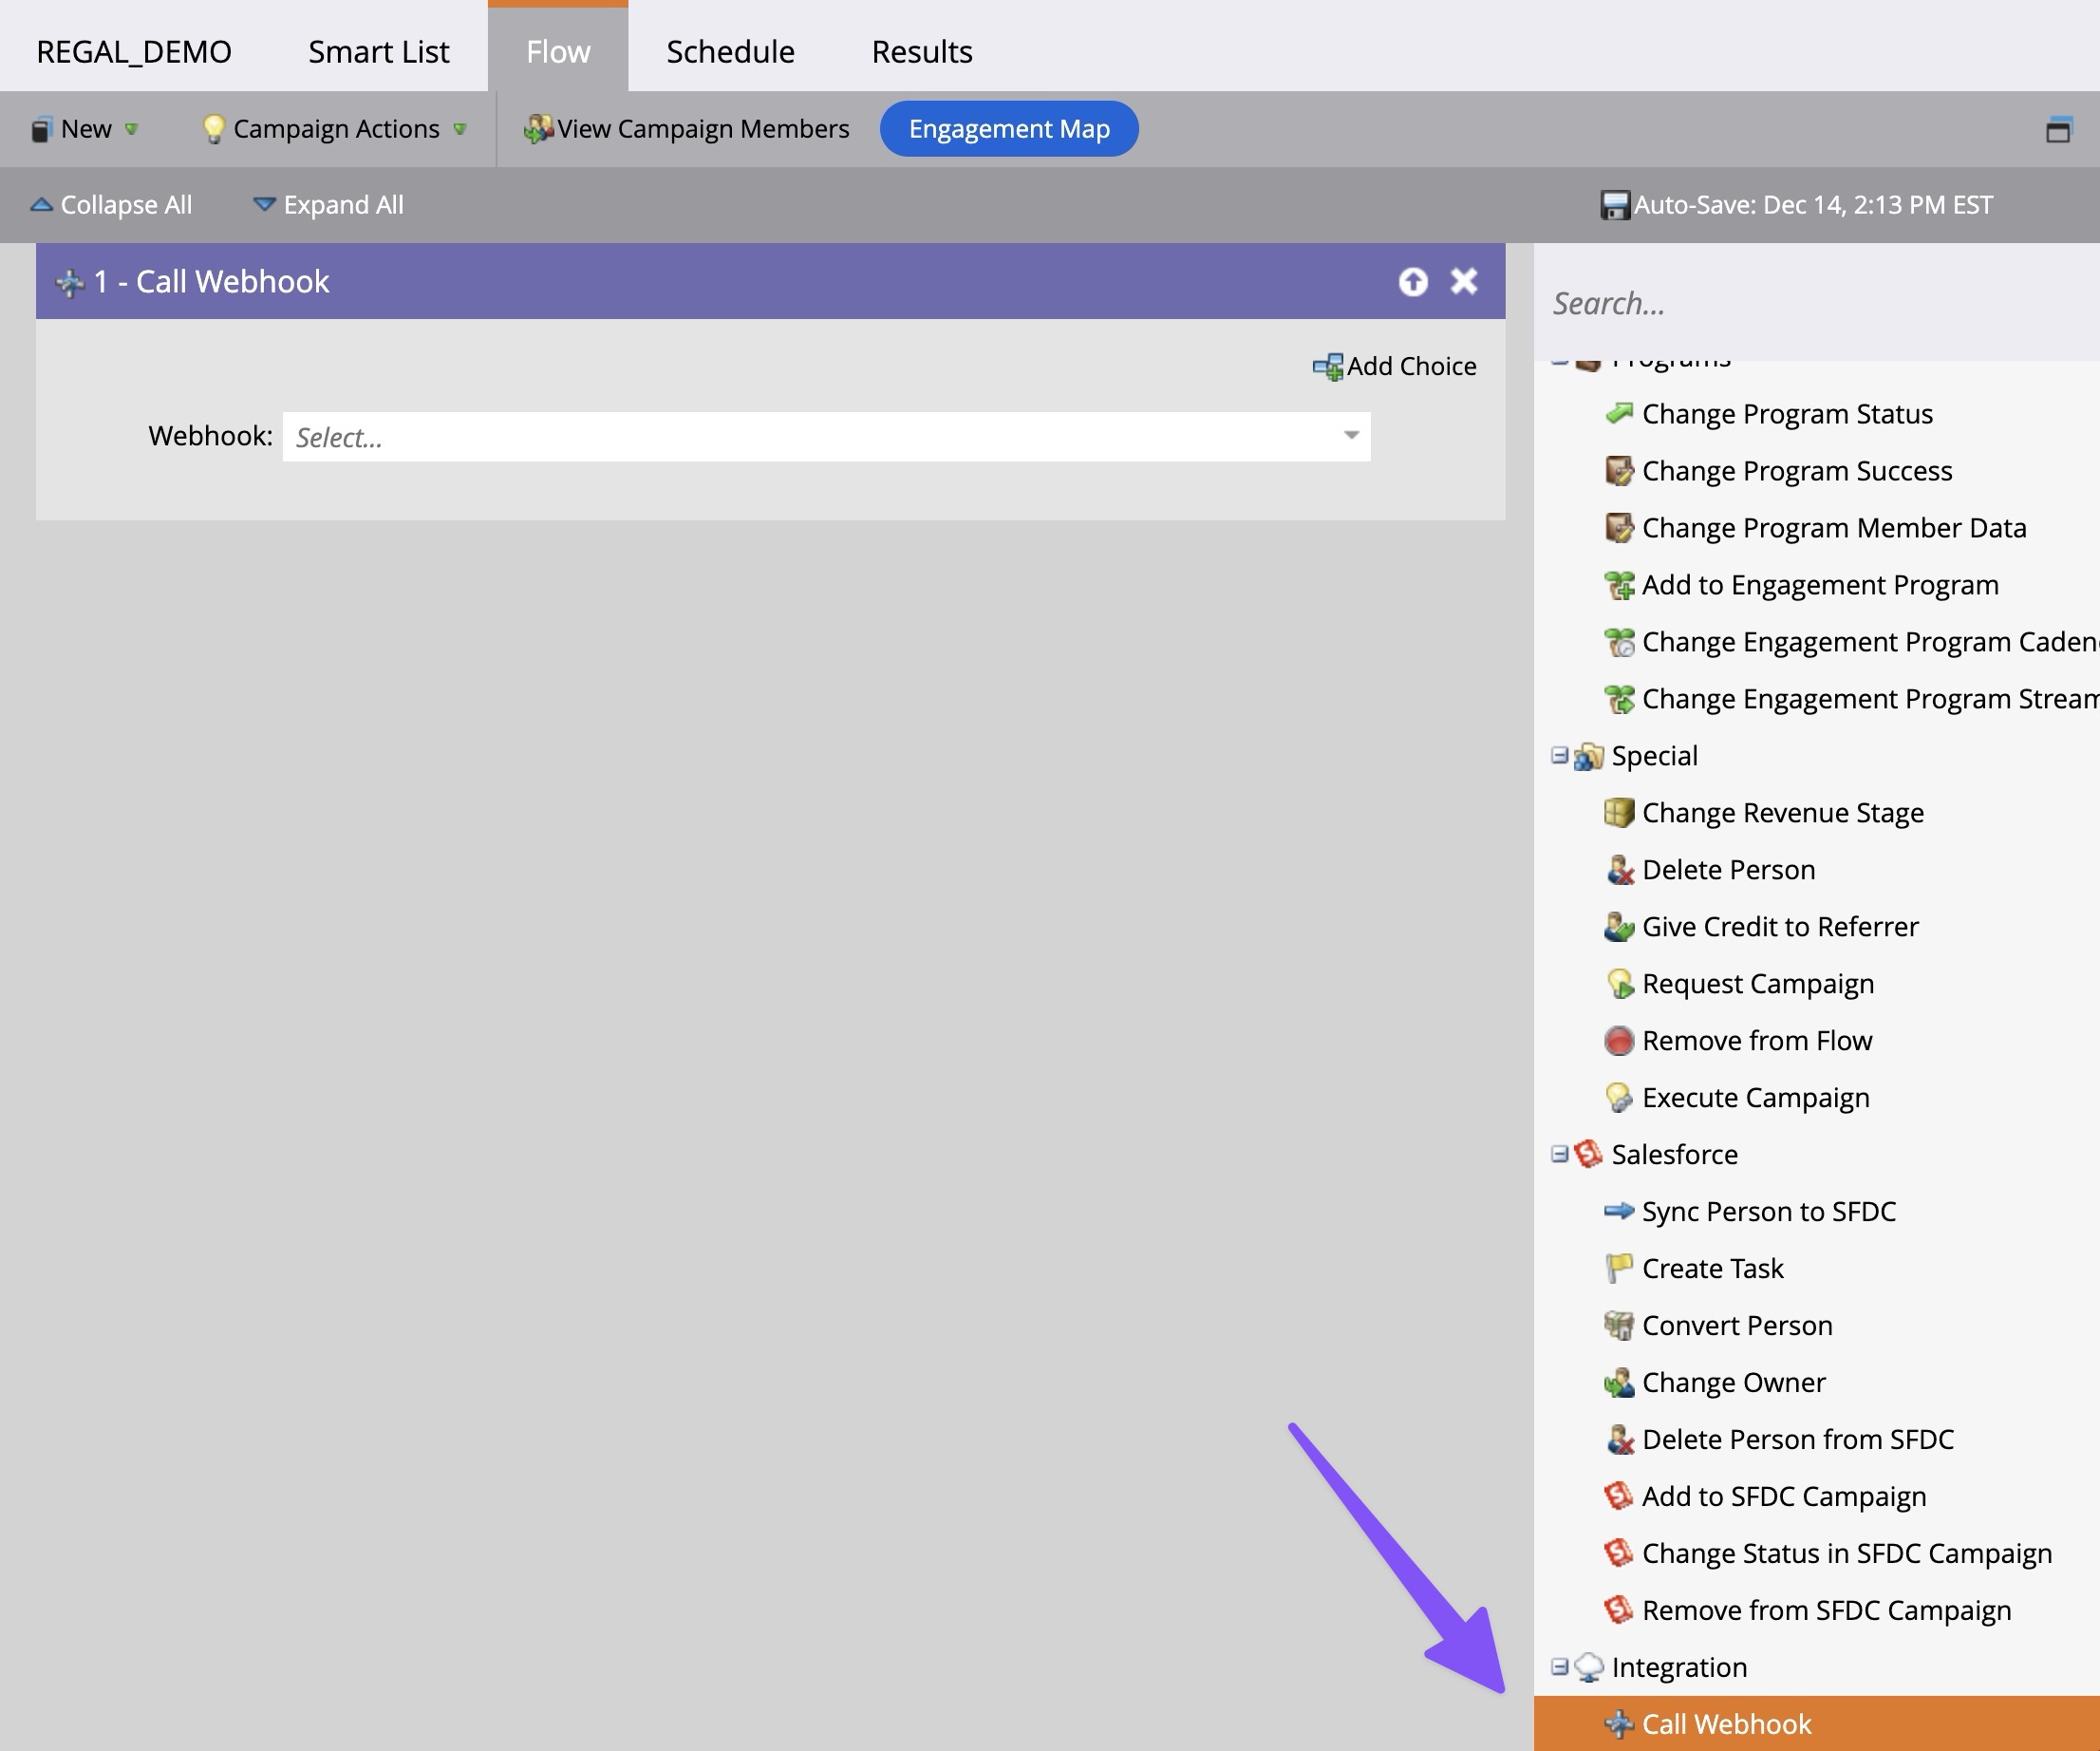
Step 4: Click on "Flow" and drag the "Call Webhook" flow action in the canvas and select the webhook you created
Updated 3 months ago